Preparing Your child for diagnostic imaging — a practical parent’s guide
Paediatric diagnostic imaging uses specialised scans — ultrasound, X‑ray, MRI and CT — to help diagnose, monitor and guide treatment for many childhood conditions. This guide explains what parents need to know to reduce anxiety, follow practical preparation steps and work with radiology staff to get safe, accurate results. We address common concerns about radiation and sedation, offer age‑appropriate scripts to explain scans, and give modality‑specific checklists. You’ll find step‑by‑step preparation for ultrasound, X‑ray, MRI and CT, a simple appointment‑day timeline, aftercare advice and answers to frequently asked questions. The guide finishes with local booking details for Life Medical Imaging Central Coast to help you arrange paediatric imaging when needed.
What is paediatric diagnostic imaging and why it matters
Paediatric diagnostic imaging is imaging tailored for children to identify injuries, infections and developmental issues. Scanners create pictures using sound waves, magnetic fields or controlled radiation so clinicians can see what’s happening inside the body. The main benefit is accurate, minimally invasive information that helps avoid unnecessary procedures — for example, confirming a fracture, identifying appendicitis or monitoring a chronic condition. When parents understand why a test is needed and how it works, they can better support their child before and after the scan and help the team get the best possible images.
Which imaging tests are commonly used for children?
Children most often have a few specific tests adapted for their needs: digital X‑ray for bones and chest, ultrasound for abdominal and soft‑tissue checks, MRI for detailed soft‑tissue and neurological imaging, CT for urgent cross‑sectional images, and dental imaging for teeth and jaws. Each test has common uses — X‑rays for fractures, ultrasound for appendicitis or urinary problems, MRI for brain and spine assessments, CT for trauma — and they differ in radiation use. Ultrasound and MRI don’t use ionising radiation and are favoured when they can answer the clinical question. Knowing the purpose of each test helps families understand what to expect and why a clinician chose one option over another.
How does imaging help keep children healthy?
Imaging supports accurate diagnosis, timely treatment and follow‑up. For example, ultrasound can confirm appendicitis to guide surgery, X‑rays check bone alignment after injury, MRI detects subtle brain changes, and CT rapidly assesses serious trauma. Imaging often changes management — avoiding unnecessary surgery, guiding medication choices or starting rehabilitation — and provides objective information that speeds up care and supports safer decisions for children.
How can parents prepare their child emotionally and practically for a scan?

Calm, age‑appropriate preparation reduces fear and improves cooperation during a scan, increasing the chance of clear images on the first try. Emotional preparation uses simple explanations, practice and reassurance. Practical preparation covers clothing, paperwork and comfort items to bring. Use short metaphors, play‑based practise and distraction in the days before the appointment so your child becomes familiar with the idea of staying still and hearing new noises. Combining practical readiness with calm framing reduces the need for repeat scans or sedation and makes the whole experience better for the family.
Evidence shows that preparing children for radiological procedures improves their experience and the quality of the scans.
Preparing Children for Radiological Procedures: A Scoping Review of Interventions
Children often feel uncertainty and anxiety before radiology procedures, which can affect scan quality and lead to rescheduling or sedation. This review found that non‑invasive preparation and education — for example, play, information and familiarisation — can improve procedural outcomes and reduce distress.
How to explain imaging to different ages
Match your explanation to your child’s age. Toddlers need very short, concrete statements; preschoolers benefit from play and stories; school‑age children can handle more detail about sensations and timing; adolescents want direct, respectful information and privacy. Try these simple scripts:
- Toddlers: “A special camera will take pictures to help the doctor see how your body is doing.”
- School‑age children: “You’ll lie still while a machine takes pictures. It might be noisy but it won’t hurt.”
Practise lying still for short periods, read a picture book or watch a short, child‑friendly video about scans. Honest, plain language reduces uncertainty and helps children cooperate during the appointment.
Comfort items and strategies that help during scans
Bringing familiar items and using distraction makes a big difference. A favourite toy, blanket, headphones for music or simple breathing games help children focus away from the procedure.
- Staff‑led techniques such as guided breathing, storytelling or role‑play with a toy can reduce anxiety. If available, a Child Life Specialist can offer personalised practice and coping tools.
- Parents being calm and offering steady praise helps. Booking the appointment at a time when your child is usually calm or rested also improves cooperation.
These approaches increase the chance of completing scans without sedation and help create a positive memory of healthcare.
Child Life Specialists are an important part of paediatric radiology care because they tailor support to each child and family.
The Role of Child Life Specialists in Paediatric Radiology Departments
Child Life Specialists design programs that help children understand and participate in medical care. Their work in paediatric radiology — from play‑based preparation to in‑room support — aims to reduce distress and improve cooperation during imaging.
Child Life Specialists also help reduce the need for sedation, improving safety and scan quality.
Child Life Specialists Enhance Paediatric Radiology Experiences and Outcomes
By offering distraction, coping strategies and pain management, child life services can lower the use of general anaesthesia, shorten procedure times and improve imaging quality and patient safety.
If you want local paediatric‑focused care, Life Medical Imaging Central Coast provides Digital XR and Dental Imaging in a modern, child‑friendly environment that prioritises low‑dose techniques and comfort. Mention these services when booking if you’d like a team experienced with children.
How should parents prepare for different imaging tests?
Each test has specific preparation steps to help the scan produce diagnostic images on the first attempt. You may be asked to fast, have a full bladder, remove metal or practise staying still — requirements differ for ultrasound, X‑ray, MRI and CT. The sections below list practical steps for each test and a quick comparison to help you prepare.
Quick tips to prioritise preparation:
- Practical: arrive on time, choose loose clothing and bring prior images if you have them.
- Communicate: tell staff about allergies, implants or recent illnesses that could affect the scan.
- Comfort: bring snacks for after fasting and a favourite toy for reassurance.
Use the referrer’s or clinic’s instructions exactly to avoid delays or a rescheduled appointment.
Key preparation steps for paediatric ultrasound
Ultrasound usually doesn’t use radiation and preparation depends on the area being scanned. Abdominal ultrasounds often need a short fast to reduce gas; pelvic or urinary studies may require a comfortably full bladder. Dress your child in loose clothing and bring a small snack for after the scan. Ultrasound uses a water‑based gel and a handheld probe that moves over the skin — it’s painless. Arrive a little early to check in and help your child settle before the sonographer calls you in.
How to prepare a child for an X‑ray
X‑rays usually need little preparation — wear easily removable clothes and take off jewellery or metal that could block the image. Reassure your child that X‑rays are quick and not painful; staff will position them safely and may use lead shielding on areas not being imaged. Digital X‑ray equipment uses low‑dose techniques tailored to a child’s size to keep exposure as low as possible. Encouraging your child to hold still for a few seconds and bringing a distraction item improves image quality.
What parents should know about MRI preparation
MRI uses magnetic fields and radio waves, so screening for metal and implants is essential before arrival. Let staff know about any medical devices or recent surgeries. MRI can be noisy and requires stillness; mock scanner practice, headphones and rehearsals often help children avoid sedation. If sedation is needed, fasting rules apply and staff will give clear pre‑ and post‑sedation instructions. Simple at‑home practise in the days before the scan can improve cooperation and reduce the chance of needing sedation.
How preparation differs for a paediatric CT scan
CT uses controlled X‑rays to produce cross‑sectional images and is often used when rapid, detailed information is needed. Paediatric CT follows low‑dose protocols to reduce radiation while keeping diagnostic quality. You may be asked to fast if contrast is planned and to discuss any contrast allergies beforehand. The team will adjust settings to your child’s size and explain dose‑minimisation measures in plain language so you understand the balance of risks and benefits.
What safety measures protect children during imaging?
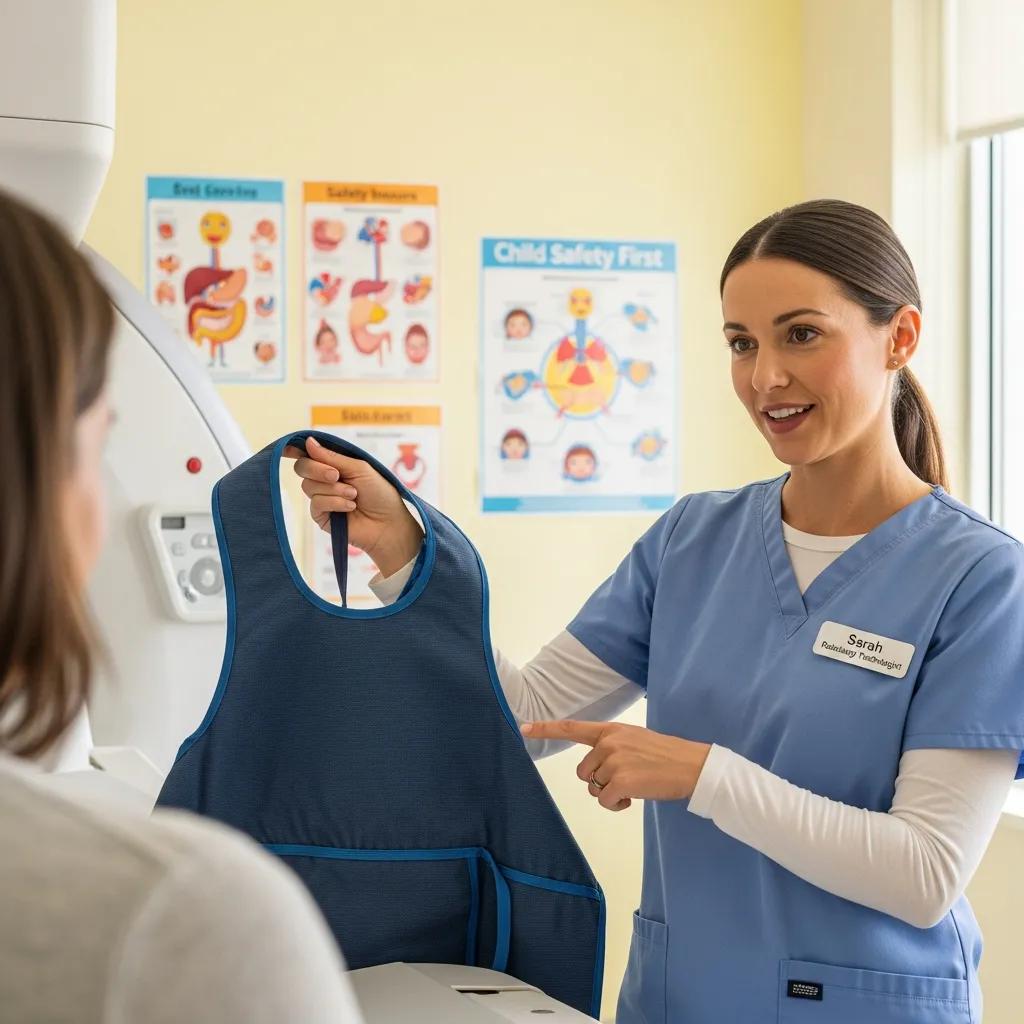
Imaging centres use both technical and procedural safeguards to protect children: low‑dose protocols, shielding when appropriate, preferring non‑ionising options where possible, and staff trained in paediatric techniques. These measures reduce exposure, improve comfort and make sure scans answer the clinical question with the least possible harm. Explaining these protections to parents helps with informed consent and reduces anxiety.
Safety measures are summarised below for quick reference.
If you’d like more reassurance, ask the imaging team about the specific dose‑reduction techniques they’ll use for your child.
How low‑dose imaging reduces radiation risk
Low‑dose imaging uses detectors and protocols designed for smaller bodies, tailoring beam intensity and scan area to the child’s size and the clinical question. Advances in digital X‑ray and CT reconstruction let clinicians get high‑quality images at lower doses. Teams follow the ALARA principle — “as low as reasonably achievable” — and will use shielding and careful planning to avoid unnecessary exposure. Knowing this helps you have an informed conversation with the clinical team about why a test is recommended and how safety is prioritised.
Which tests use no radiation?
Ultrasound and MRI are non‑ionising. Ultrasound uses sound waves and is excellent for abdominal, pelvic and soft‑tissue checks. MRI uses magnetic fields for detailed images of the brain, spine and joints. When these options can answer the clinical question, clinicians will usually choose them to avoid radiation exposure — especially when repeat imaging may be needed.
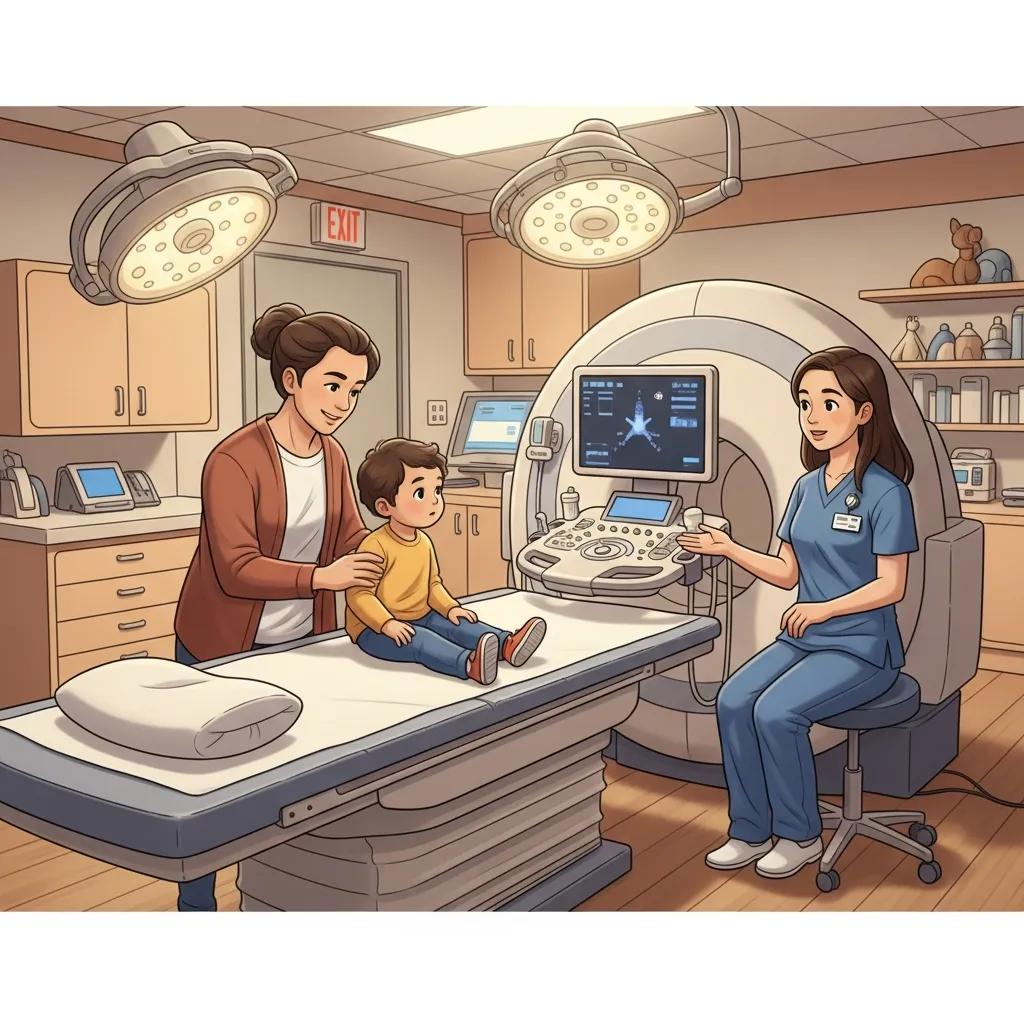
What happens on the day of the appointment?
A clear timeline and checklist help families arrive prepared, reduce stress and keep the visit running smoothly. Typical steps include arrival and check‑in, safety screening, the scan itself (with parent involvement where allowed) and any post‑scan instructions or observation. Knowing the roles involved — reception, radiographer, radiologist and possibly anaesthesia or paediatric support staff — and what to bring helps avoid surprises.
Before the timeline, practical arrival tips:
- Bring the referral and any prior imaging if available.
- Bring consent forms and important medical information.
- Bring comfort items and snacks for after the scan.
This timeline helps you plan travel, parking and childcare logistics so the appointment runs with minimal stress.
How to prepare for check‑in and arrival
Confirm the referral details before you leave home and bring any previous scans or reports. Arrive 10–20 minutes early to complete paperwork and screening. Dress your child in comfortable, easily removable clothes and bring medical information such as allergies or prior surgeries. If sedation is planned, follow fasting instructions exactly and ensure an adult can accompany the child home. Allow extra time for parking and settling — a calm arrival helps everyone.
What to expect during the scan and how parents can help
Radiographers will position your child and explain each step in plain, child‑friendly language. Parents can usually stay in the room unless safety rules prevent it, and their role is to comfort the child, help them stay still and follow staff instructions — you may be asked to wear protective shielding in some cases. Sensations vary by test: ultrasound feels like gentle pressure, MRI is noisy, and CT is quick but requires stillness. Knowing these things in advance helps you prepare and supports a successful scan.
What should parents know about aftercare and getting results?
Aftercare depends on the scan type and whether sedation or contrast was used. Most non‑sedated studies need no special observation and children can resume normal activity. If sedation or contrast was used, staff will give monitoring and clear discharge instructions. Watch for worrying signs such as persistent vomiting, unusual drowsiness or allergic reactions and contact the clinic or referring clinician if they occur.
Radiologists prepare a formal report that is sent to the referring clinician. Families usually receive the interpretation and next‑step advice from their referring doctor rather than directly from the imaging centre. Knowing this workflow helps set expectations about timing and who will explain results.
If you need follow‑up imaging or want to check on a report, Life Medical Imaging Central Coast can assist with bookings and enquiries.
For bookings or questions about paediatric imaging, phone Life Medical Imaging Central Coast on 02 4326 7000 or email info@lifeimaging.com.au. When you call, have the referral, your child’s name and any special needs ready. The clinic’s Request An Appointment function is also available to make scheduling easier and to ensure paediatric‑friendly resources are allocated.
How is post‑scan care managed for children?
Most children return to normal activities after non‑sedated scans. Children who received sedation will be observed until fully alert and safe to go home. Staff provide written and verbal discharge instructions covering diet, activity and signs to watch for after contrast or sedation. Arrange transport if sedation was used and plan for a quiet recovery at home. If your child shows worrying symptoms — difficulty breathing, persistent bleeding or ongoing vomiting — contact the referring clinician or imaging provider straight away.
When and how will parents receive imaging results?
Radiologists produce a formal report sent to the referring clinician, who explains the findings in the context of your child’s health. Routine reports usually return within a few days; urgent studies are prioritised and communicated more quickly. Plan to discuss results with the referring doctor, who will advise on next steps. If you want to check report status, contact the imaging centre using the details above.
What do parents often ask about paediatric imaging?
Common questions are about calming a child, what they should eat before a scan and when sedation is needed. Clear, practical answers reduce anxiety and make planning easier. Below are simple, evidence‑informed strategies and quick rules for fasting and sedation.
Easy calming strategies to use in the days and minutes before a scan:
- Practice stillness: Play “statue” games so your child gets used to lying still for short periods.
- Use distraction: Bring headphones, a story or a favourite toy to the appointment.
- Keep routine: Maintain usual sleep and meal patterns to reduce baseline anxiety.
How do you calm a child before a scan?
Immediate calming techniques include slow breathing exercises, distraction with stories or music and giving a familiar comfort item. Longer‑term preparation — role‑play, short videos or visiting a mock scanner if available — reduces anticipatory anxiety. If your child has higher anxiety, speak to the referring clinician early about support options such as practice sessions or access to a Child Life Specialist. Combining short‑term calming with preparation improves the chance of completing scans without sedation.
What should a child eat or avoid before different imaging tests?
Fasting and fluid instructions depend on the test and whether sedation or contrast is planned. MRI with sedation usually requires fasting for solids and restricted clear fluids; many X‑rays and simple ultrasounds allow normal eating. Full bladder instructions for pelvic or urinary ultrasounds will specify timing for fluids so your child arrives with a comfortably full bladder. Always follow the exact instructions from the referrer or imaging centre to avoid delays.
When is sedation recommended for child imaging?
Sedation is used when a child cannot stay still long enough for a diagnostic‑quality scan — common reasons include young age, developmental differences or pain. The team weighs the risks of sedation against the benefit of getting essential information. If sedation is planned, clinicians will explain fasting rules, consent requirements and post‑sedation monitoring. Parents should arrange for an adult to accompany the child home and expect a short recovery period at the clinic. Clear pre‑procedure communication reduces last‑minute cancellations.
How can parents book paediatric imaging at Life Medical Imaging Central Coast?
To book, provide a referral, the child’s details and any special requirements so the clinic can schedule the right modality and allocate paediatric resources. Life Medical Imaging Central Coast accepts referrals and can explain preparation steps and appointment options. Have the referral, child’s name, date of birth and relevant medical history ready when you contact the clinic.
Contact and booking steps
Follow these steps to request an appointment or ask a question:
- Prepare referral details: Have the referral and the child’s information ready before you call or email.
- Contact the clinic: Phone 02 4326 7000 or email info@lifeimaging.com.au to discuss suitable times and preparation needs.
- Request An Appointment: Use the clinic’s online Request An Appointment form if you prefer; include any special needs so staff can plan appropriately.
Child‑friendly facilities and services at Life Medical Imaging
Life Medical Imaging Central Coast is an independent radiology clinic offering a wide range of imaging services with paediatric care in a comfortable, modern setting. Services include paediatric Digital XR and Dental Imaging, sub‑specialist reporting, and the latest low‑dose technology to reduce radiation exposure. These features give families confidence that their child will be seen by experienced staff using contemporary equipment, with comfort and safety as priorities.
Frequently asked questions
What should I do if my child is anxious about the imaging procedure?
If your child is anxious, use calming techniques like slow breathing, stories or music. Prepare them with simple explanations and short role‑play. Visiting a mock scanner or involving a Child Life Specialist, where available, can help. Let staff know about any worries before the appointment so they can plan extra support.
Are there any dietary restrictions before my child’s imaging appointment?
Dietary rules depend on the test. MRIs with sedation usually require fasting for a set period, while many X‑rays and ultrasounds allow normal eating. Follow the specific instructions from the referring clinician or imaging centre to avoid delays or rescheduling.
How can I ensure my child is comfortable during the imaging process?
Bring familiar comfort items like a favourite toy or blanket and explain the procedure in a reassuring way. If allowed, headphones with music can help. Your calm presence matters — speaking softly and offering praise supports your child’s comfort and cooperation.
What should I do if my child needs sedation for the imaging procedure?
If sedation is required, follow pre‑sedation instructions carefully, especially fasting rules. Arrange an adult to take the child home afterwards, as they may be drowsy. The imaging team will give clear post‑sedation care instructions and tell you what signs to watch for.
How can I prepare my child for the sounds and sensations during an MRI?
Explain that the MRI makes loud, repetitive noises but is not harmful — some children compare it to a vacuum cleaner or drum. Practise lying still at home, use headphones during the scan and, if possible, schedule a mock MRI session to familiarise your child with the environment and sounds.
What are the benefits of low‑dose imaging technology for children?
Low‑dose techniques limit radiation exposure while still producing clear diagnostic images. Because children are more sensitive to radiation, optimised equipment and settings tailored to a child’s size make scans safer and give parents greater confidence in the process.
How can I follow up on my child’s imaging results?
Contact the referring clinician to discuss results — they receive the radiologist’s formal report and will explain the findings and next steps. If you have questions about the report or timing, the imaging centre can help check the report status.
Conclusion
Preparing your child for diagnostic imaging helps reduce anxiety and improves the chance of getting clear, useful results first time. With clear explanations, practical preparation and simple comfort strategies, parents can make the experience easier for their child. Life Medical Imaging Central Coast offers paediatric‑friendly services that focus on comfort and safety — contact us for help or to book an appointment.